

By Duncan MacDougall June 6, 2023
Set the PIN Type on the Intelligent Controller
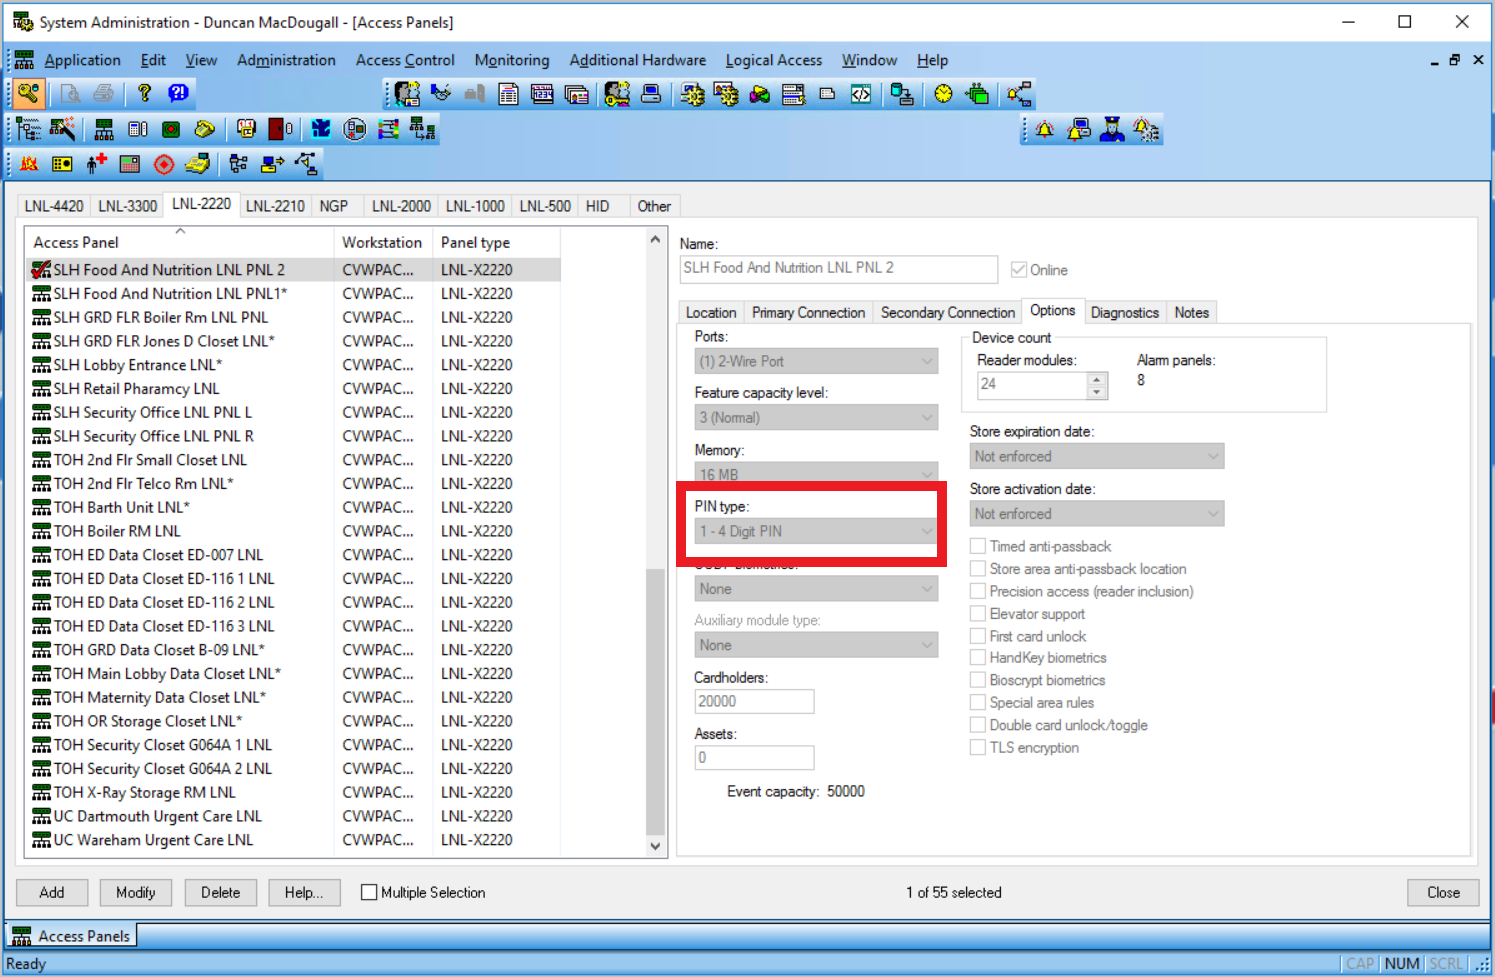
In System Administration, go to the Access Control menu > Access Panels and then choose the right
tab for the intelligent controller you are working with. Select your IC board, select Modify, and then
choose the desired pin type. Here we are choosing a 4 digit pin.
Enable PIN on the Reader
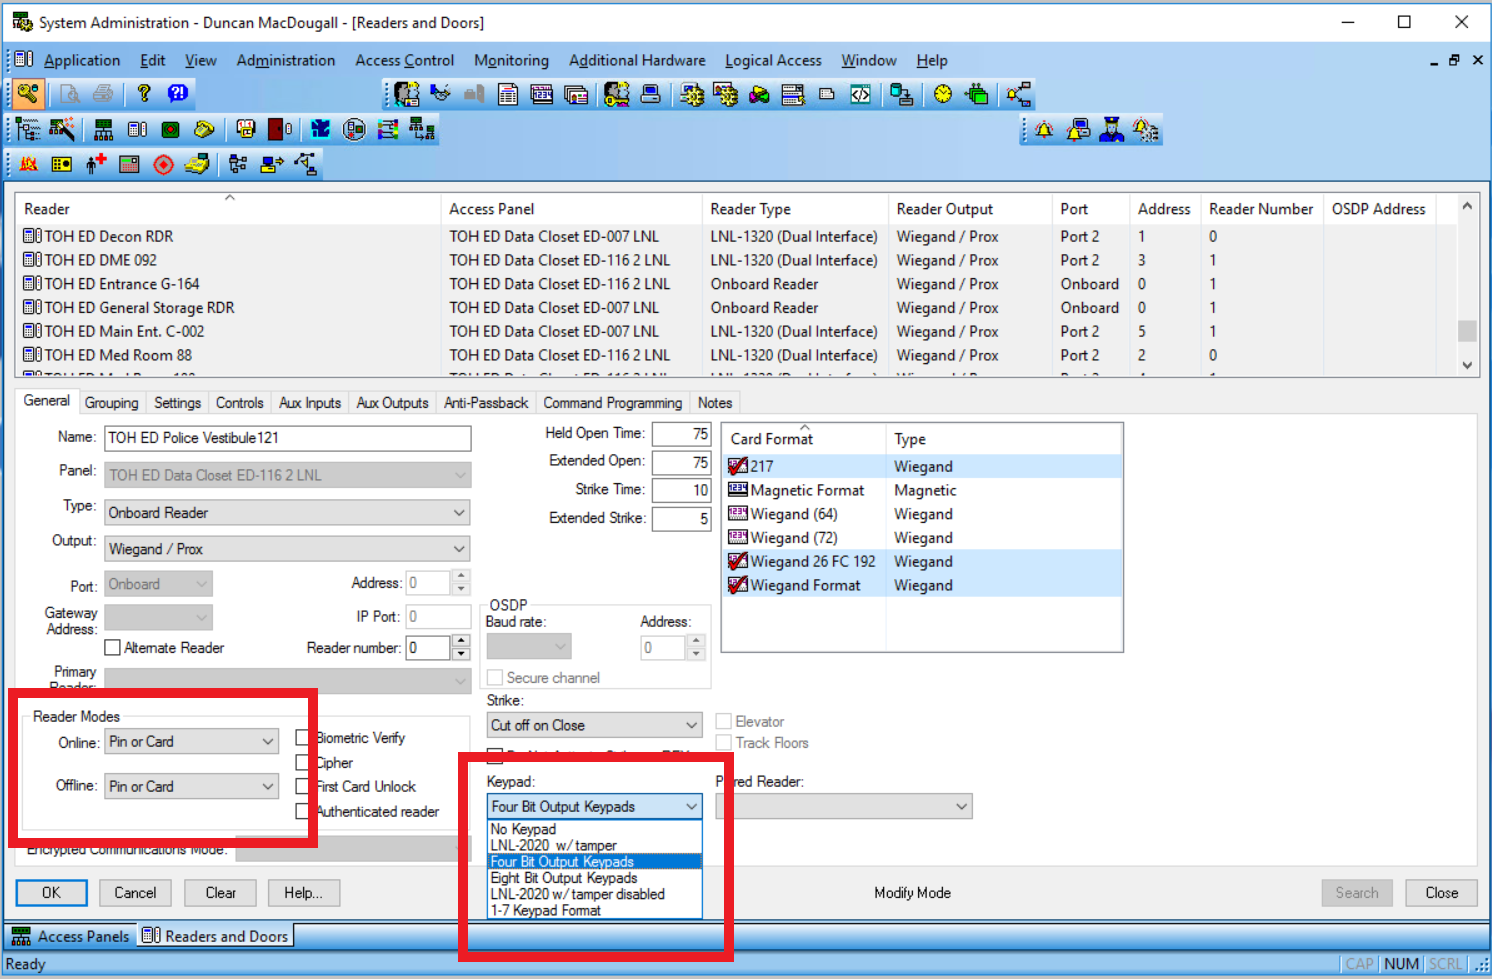
Next, go to the Access Control menu > Readers and Doors and select the reader/keypad you are working on.
Choose modify on the bottom and under the keypad section choose the option that corresponds with
what you chose in the previous step. Here we are choosing “four bit output keypads”. Also choose the
correct reader mode for online and offline modes (card AND pin, card OR pin, locked, unlocked, or card
only).
Assign PIN Codes to Users
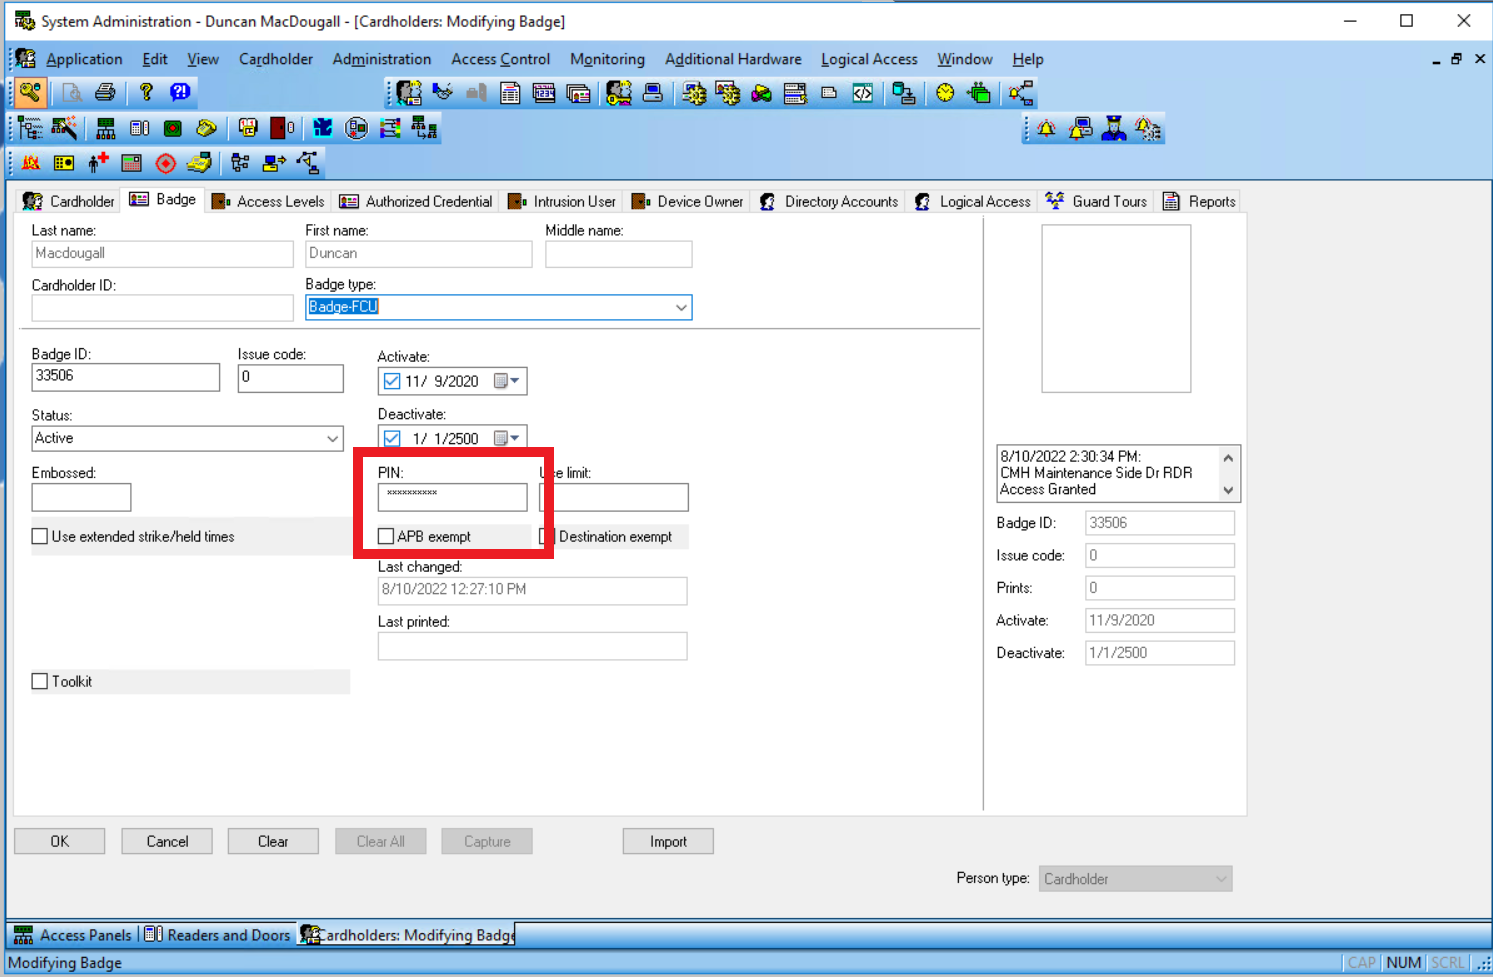
In the Administration > Cardholders menu choose Search and then enter the first and/or last name of
the individual you need to assign a pin to. Choose OK and scroll via the bottom right until you reach the correct
profile as there may be more than one person matching your search criteria. Next, choose the Badge tab
and click on the Badge ID so that it has a check on it. Choose Modify and enter a pin in the PIN section.
Save the pin and test it at the reader you configured in step two. You do not have to push # after
entering your pin. The door should unlock if you have chosen card OR pin. If you have chosen card AND
pin you need to present your badge and enter your pin in either order. The door will unlock if you have it in your
access level.