

By Duncan MacDougall November 9, 2023
Using a Windows based NVR as a Time Server for Network Cameras
In this post we are going to explore how to use a Windows based NVR as a time server for the cameras it is recording. Why might one want to do this?
NVRs typically come with two NIC ports, one for the client connections or egress traffic, and one for the camera connections, or ingress traffic. Typically the camera NIC is on a separate network which results in cameras not having the ability to reach the corporate time server. Using the NVR to connect to the enterprises NTP server and then feed that down to the cameras is a great way to keep all the devices on the same time. Nothing is more annoying than reviewing incidents across multiple cameras that are on different times!
Making the NVR an NTP Client
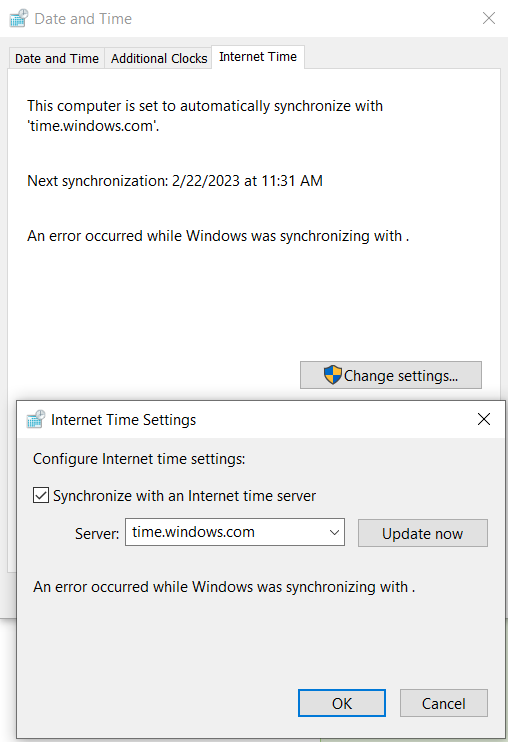
Armed with the NTP details of the network you are connecting your server to, navigate to the Control Panel and click on Date and Time. You may have to change your view to large or small icons to find the setting easier.
Go to the Internet Time tab and choose Change Settings. Then check off “Synchronize with an Internet time server” and enter the IP address or hostname for the time server. Choose Update now and confirm you see a success message. Save the settings.
We now have our NVR syncing time with the corporate NTP server. Next we will configure the NVR so that it can give that time to any of the cameras on the network.
Making the NVR an NTP Server
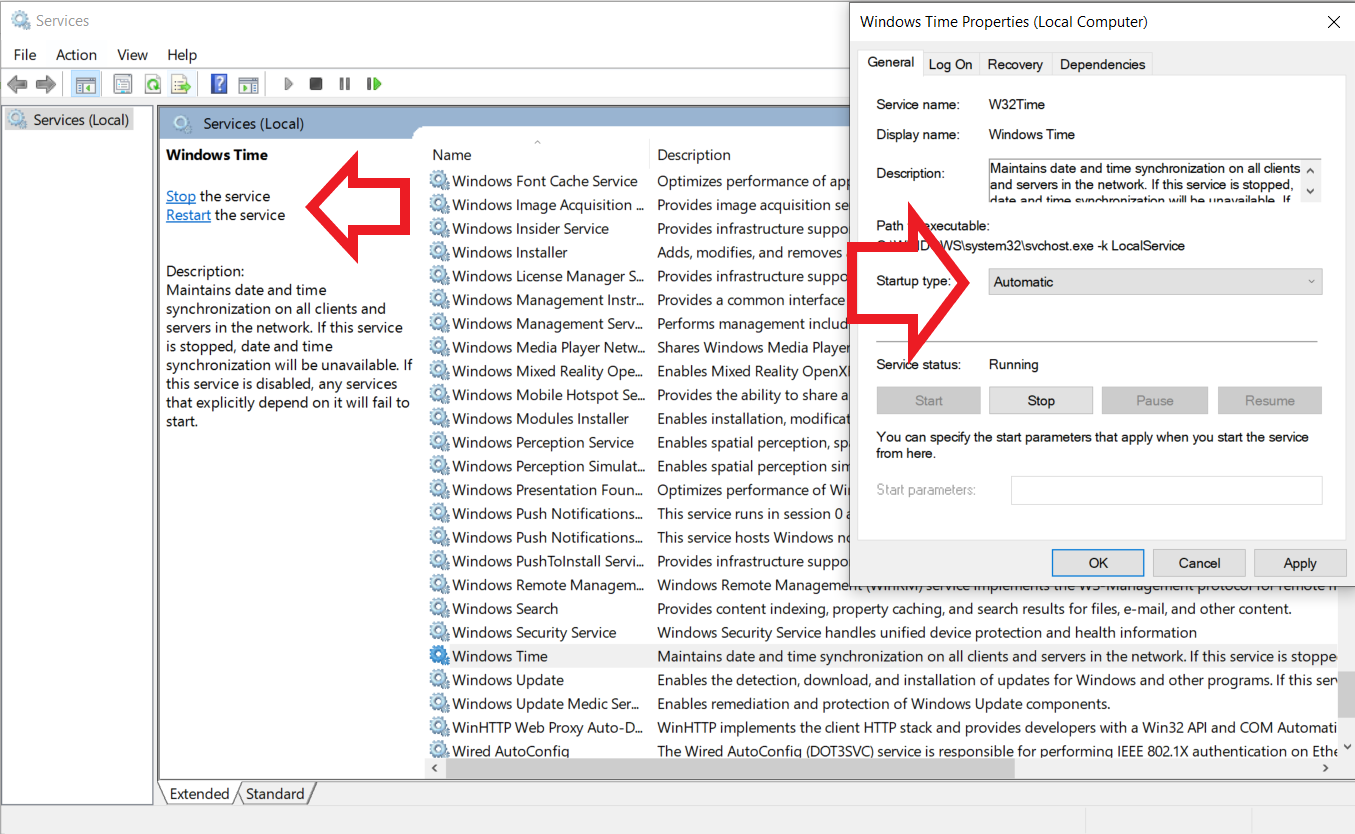
To configure this system as as both an NTP client and server we will have to enable the W32Time service, change its startup type to automatic, edit the systems registry, and open the ports in the firewall.
First open the services application and locate the Windows Time service. Click it and choose start the service to the left and configure it for Automatic start up (right click service, properties, start up type > automatic. Apply and OK).
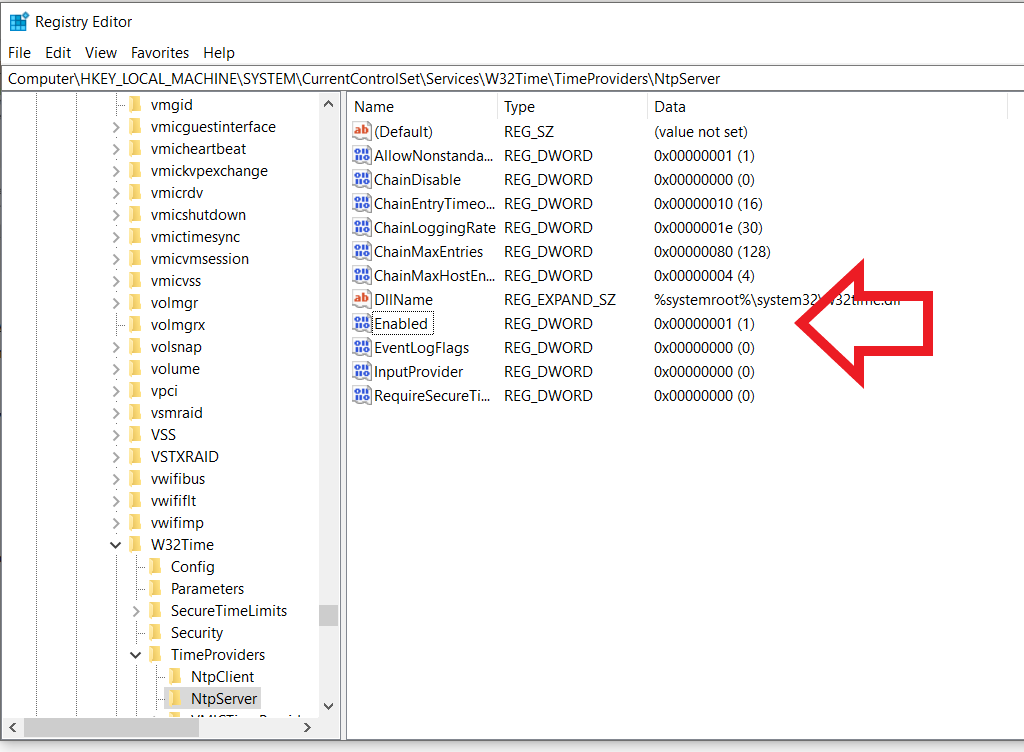
Next open Regedit and navigate to HKEY_LOCAL_MACHINE \ System \ CurrentControlSet \ Services \ W32Time \ TimeProviders \ NtpServer and change Enabled from 0 to 1. Always make registry edits with care and do not change anything if you are not sure of what it will do.
Next we will update the Windows Time service’s running configuration. Open a command prompt as administrator and type the below command:
w32tm /config /update
Then verify that the NTP server service is enabled with the command:
w32tm /query /configuration
Next we have to configure the Windows Firewall to allow the traffic by entering the two commands below:
netsh advfirewall firewall add rule name="NTP Server" dir=out protocol=udp localport=123 profile=any enable=yes action=allow

netsh advfirewall firewall add rule name="NTP Server" dir=in  protocol=udp localport=123 profile=any enable=yes action=allow
Lastly, ensure the servers IP is set to be the time server on the cameras and that daylight savings time is entered correctly as well.
Daylight savings time starts on the second Sunday in March and ends on the first Sunday in November. In most installations with a separate camera network the time server IP would be the same as the cameras default gateway IP.