

| April 22, 2024
To start, all of your disk’s will have to be the same size and installed into the Proxmox server before configuring. I prefer to create a label for the drive bay with the disks serial number for easier management in the future.
Wipe Drives
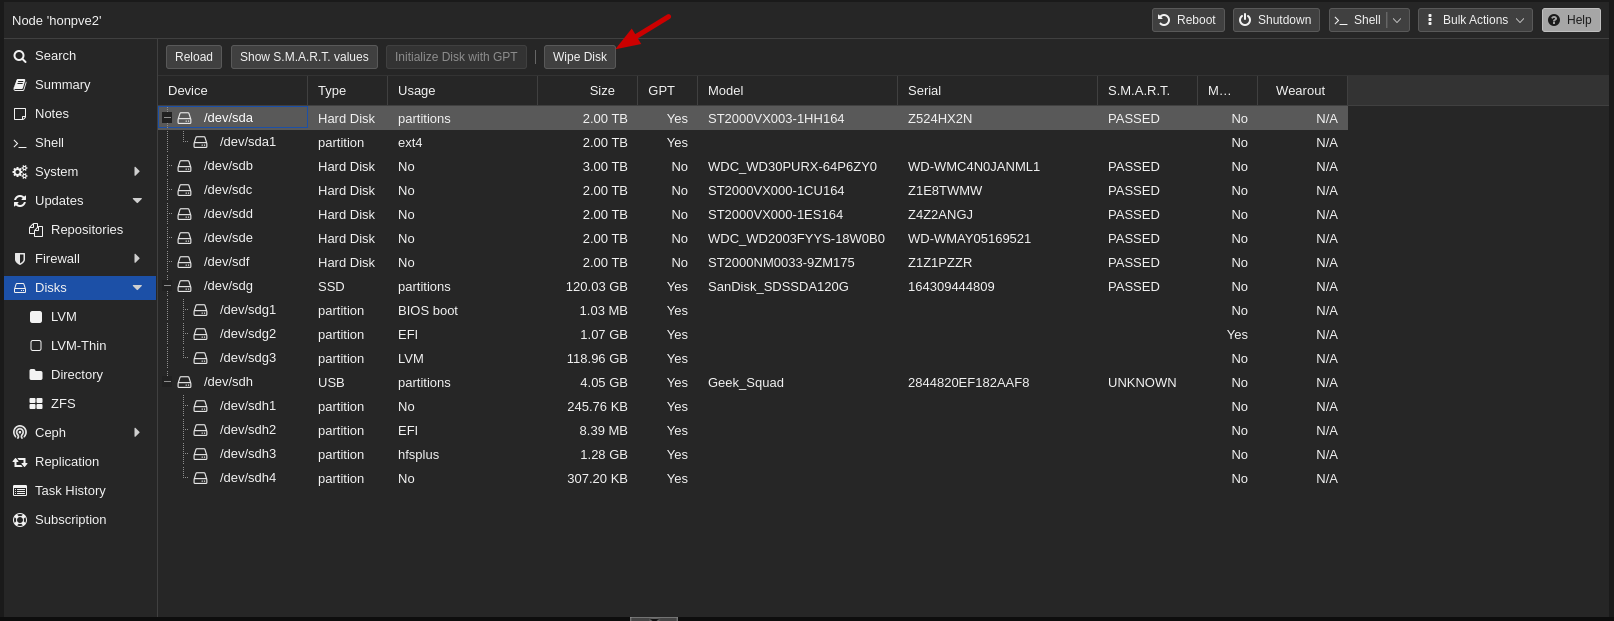
In the Proxmox web interface click on the name of your server in the tree to the left and then choose disks in the following menu.
After highlighting the first disk you are going to use for your pool choose wipe. Repeat this process for all of the disks you plan to use for your pool.
Create ZFS Pool
Further down the menu choose ZFS and then Create ZFS. Check off all of the disks that you wiped in the previous step. Next, give your ZFS pool a unique name and uncheck “add storage”. Set your RAID level according to your needs. Note that ZFS uses different terminology for RAID. I prefer RAIDZ2 which is the equivalent of RAID6 and can incur two disk failures before losing data. You can learn more about the different RAID options in ZFS here.
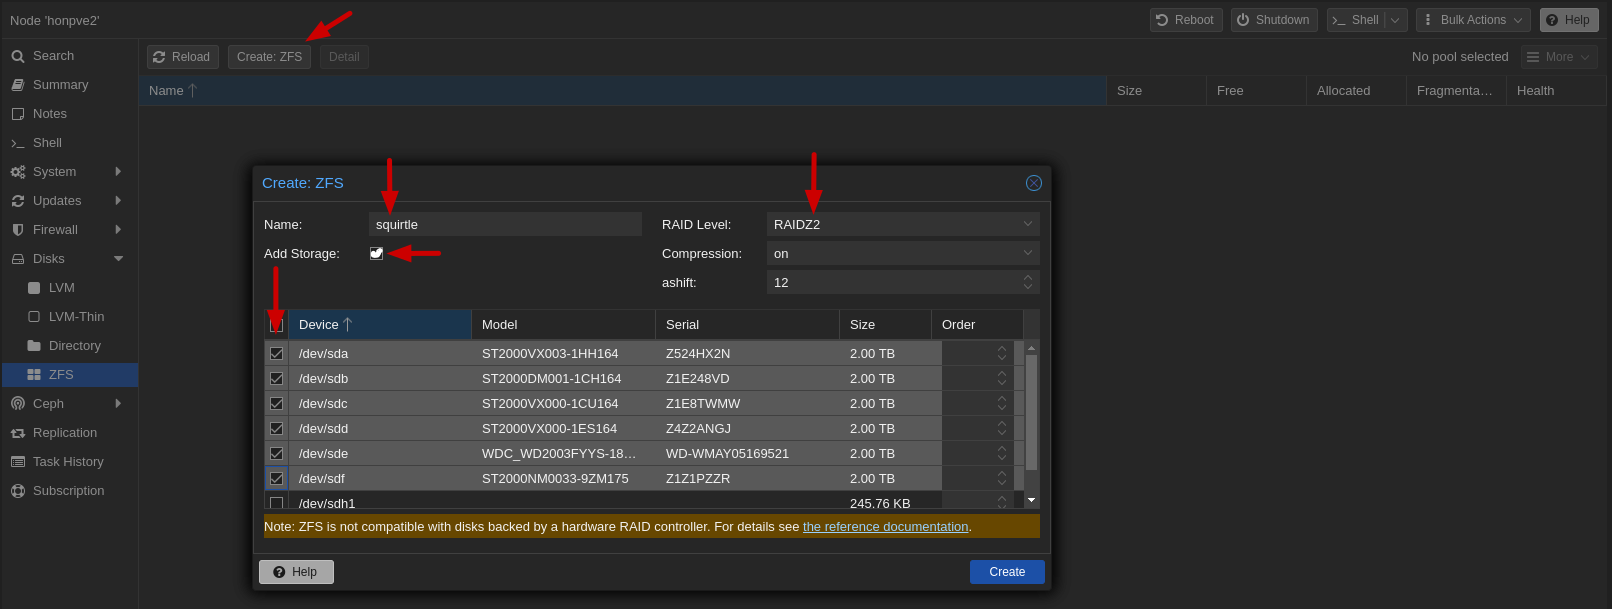
Sometimes during this process you will get the message “No Disks unused”. This is likely because the drives have partitions on them. Make sure to wipe all of your drives as outlined in the first step.
Create Filesystems
Navigate to the console for your Proxmox server and type the following commands to create the filesystems for use within Proxmox:
zfs create poolname/isos
zfs create poolname/vm-disks
zfs create poolname/backups
Add to Storage
Navigate to Datacenter > Storage > Add > Directory in the Proxmox web interface to finish creating the filesystems. Provide the name of the filesystem as well as the directory as seen here:
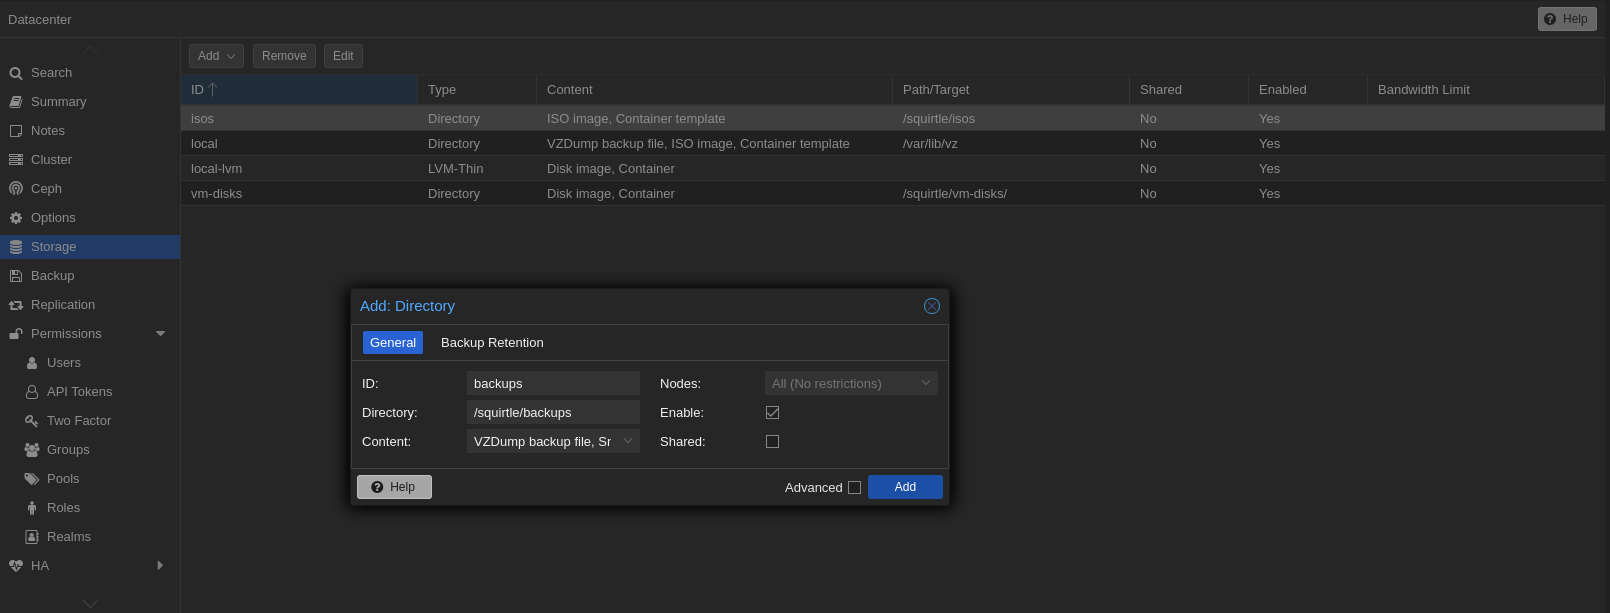
Configure the iso filesystem for container templates and isos, configure the vm-disks filesystem for disk images and containers, and configure the backup filesystem for snippets and vzdump.
Now these filesystems are ready to use as seen in the tree to the left.

Check ZFS Status
In the Proxmox web interface choose your server and then the ZFS option under Disks. Choose the name of your pool and then the Detail button to view real-time data on your ZFS pool. It is a good idea to check this now to make sure all of the disks are online and without error.
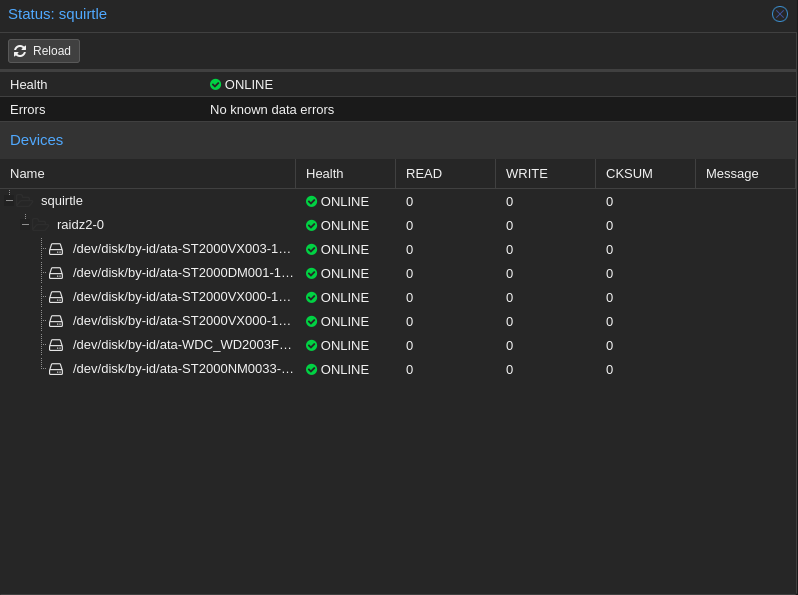
Check back often to make sure your disks don’t need to be replaced!
Helpful Commands
zpool status - shows the current status of your pool, much like in the web interface.
zpool list - helpful to see the size of the pool vs how much has been allocated.
zfs list - shows you the filesystems you've created, how much is used vs available, and what their mount points are.
zpool clear - clears warnings and resets the status of the pool.