

| June 21, 2024
Replace Damaged Disks:
Replacing a damaged disk in ZFS is easy due to the built-in tools and commands it has to offer the user. If you experience a faulted disk in your Proxmox ZFS array you can replace it with the steps below.
If your replacement disk is larger than the existing disk enter the below command to ensure your pool will automatically grow to the new size once all disks have been replaced to match the larger size.
zpool set autoexpand=on POOLNAME
Once this command has been run, note the serial number of your old disk and power down your Proxmox server. Remove the faulted drive and replace it with a new one. Label the outside of the drive bay with the new hard drives serial number for future use.
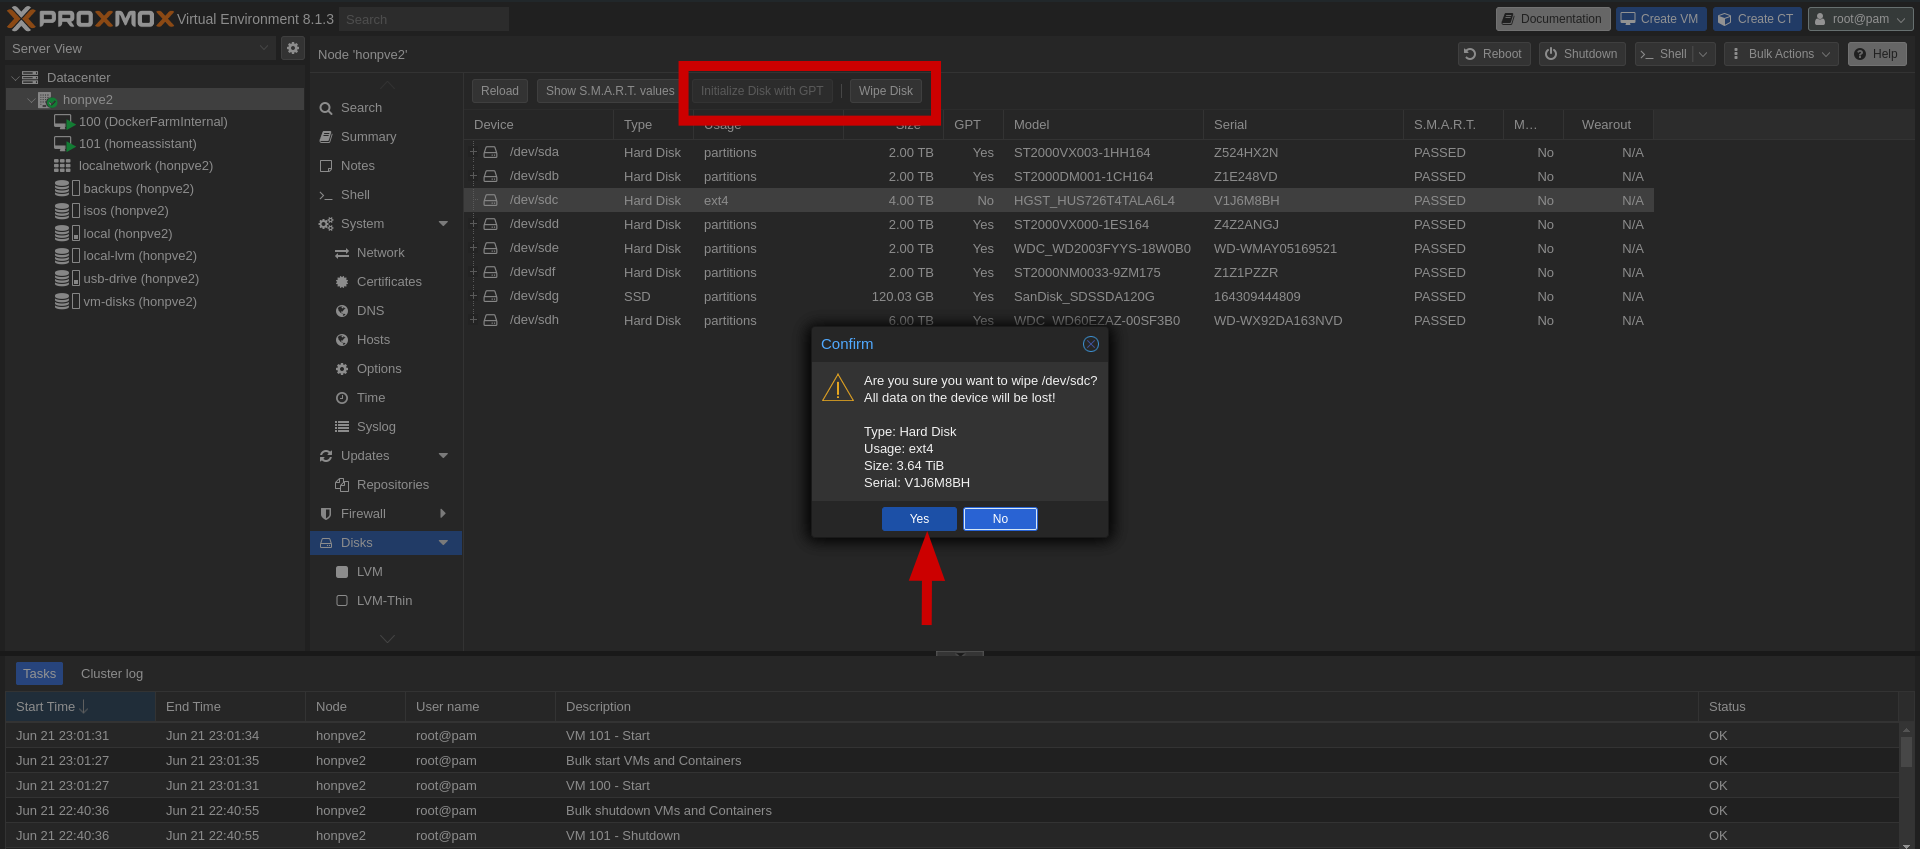
Power back up your server and navigate to the disks screen. Highlight your new disk and choose Wipe Disk as well as Initialize with GPT once it has been wiped.
Next, we have to tell our ZFS pool to replace the old disk with the new one. To do that we will start by finding the path of the new disk. Run the below command and note its output.
ls -la /dev/disk/by-id
We have received the following output:
root@honpve2:~# ls -la /dev/disk/by-id | grep sdc
lrwxrwxrwx 1 root root    9 Jun 21 18:11 ata-HGST_HUS726T4TALA6L4_V1J6M8BH -> ../../sdc
lrwxrwxrwx 1 root root    9 Jun 21 18:11 wwn-0x5000cca0bcdf3192 -> ../../sdc
This shows us that the new disk has a serial number of V1J6M8BH and has a path of /dev/disk/by-id/ata-HGST_HUS726T4TALA6L4_V1J6M8BH.
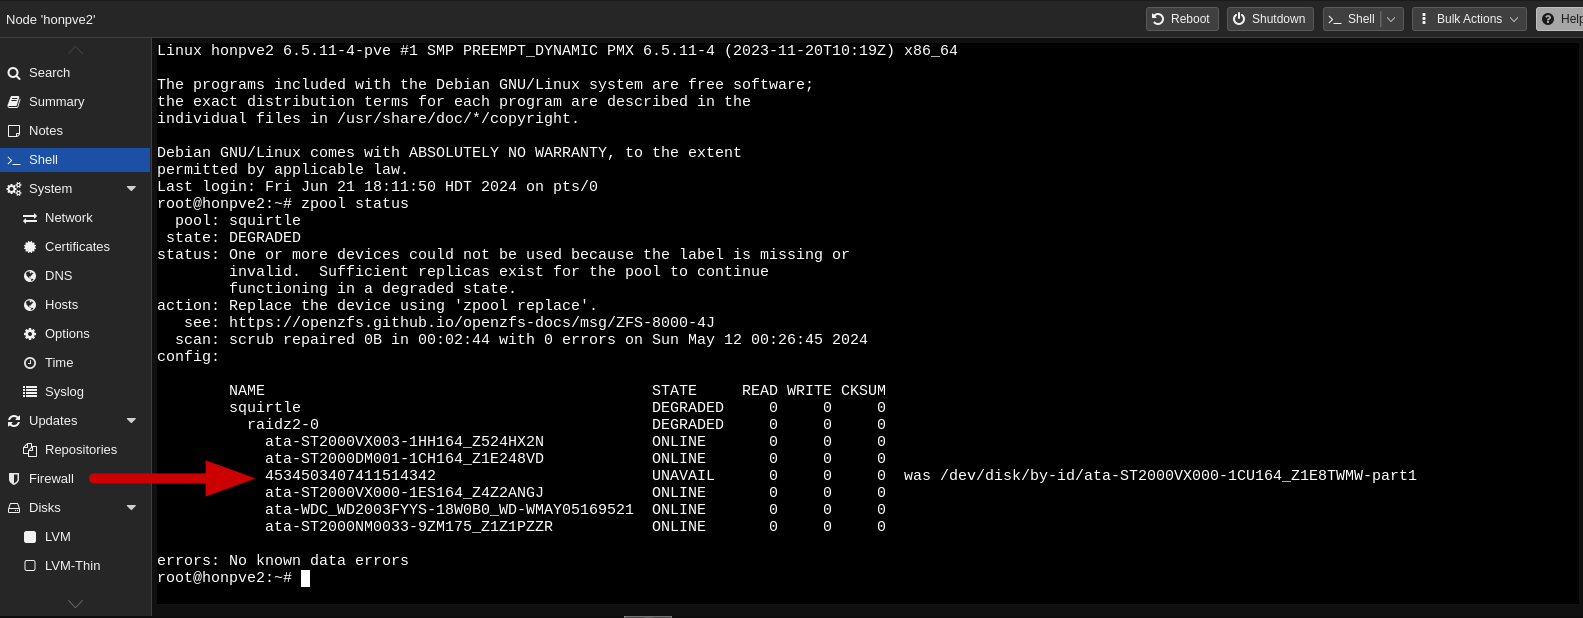
We are now ready to make the new disk part of our pool. First, we need the GUID of the disk to be replaced. This information can be found using the zpool status command as seen here:
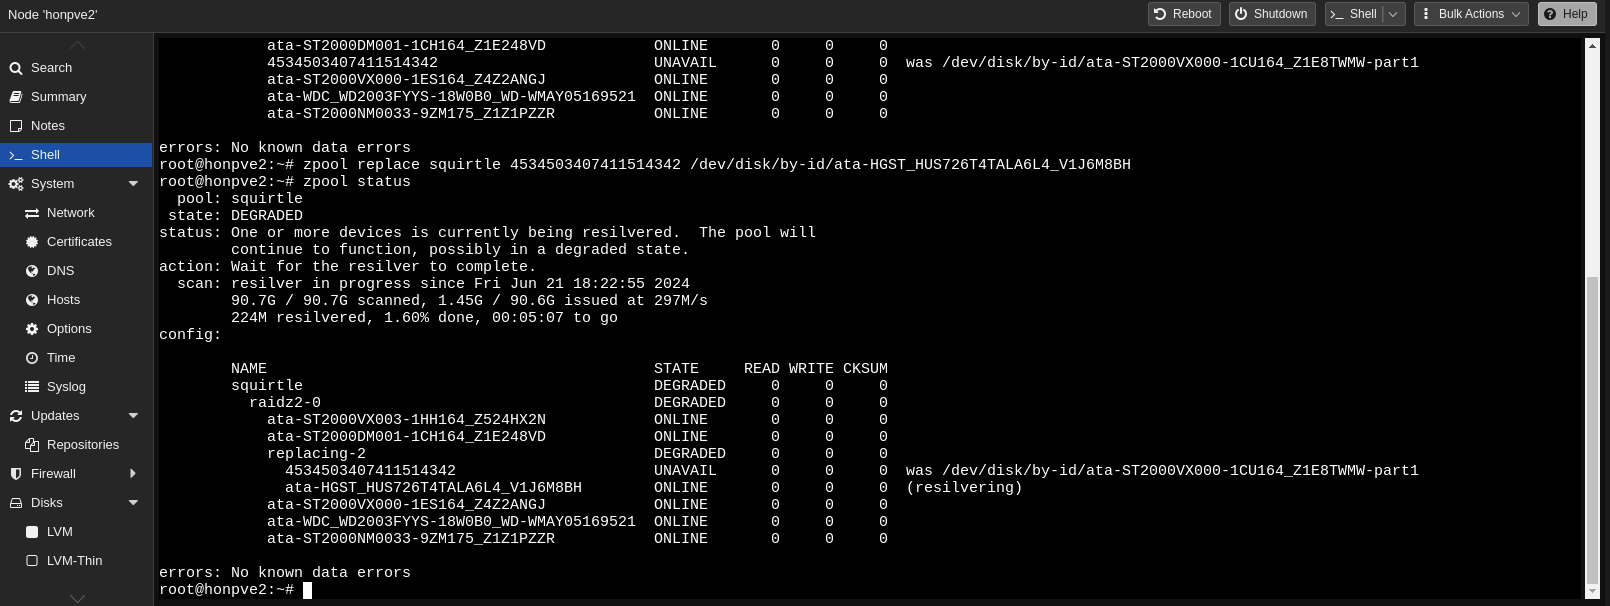
We will then enter the below command to initiate reslivering of our pool:
zpool replace squirtle 4534503407411514342 /dev/disk/by-id/ata-HGST_HUS726T4TALA6L4_V1J6M8BH

OR

zpool replace POOLNAME OLD_DISKS_GUID NEW_DISKS_PATH
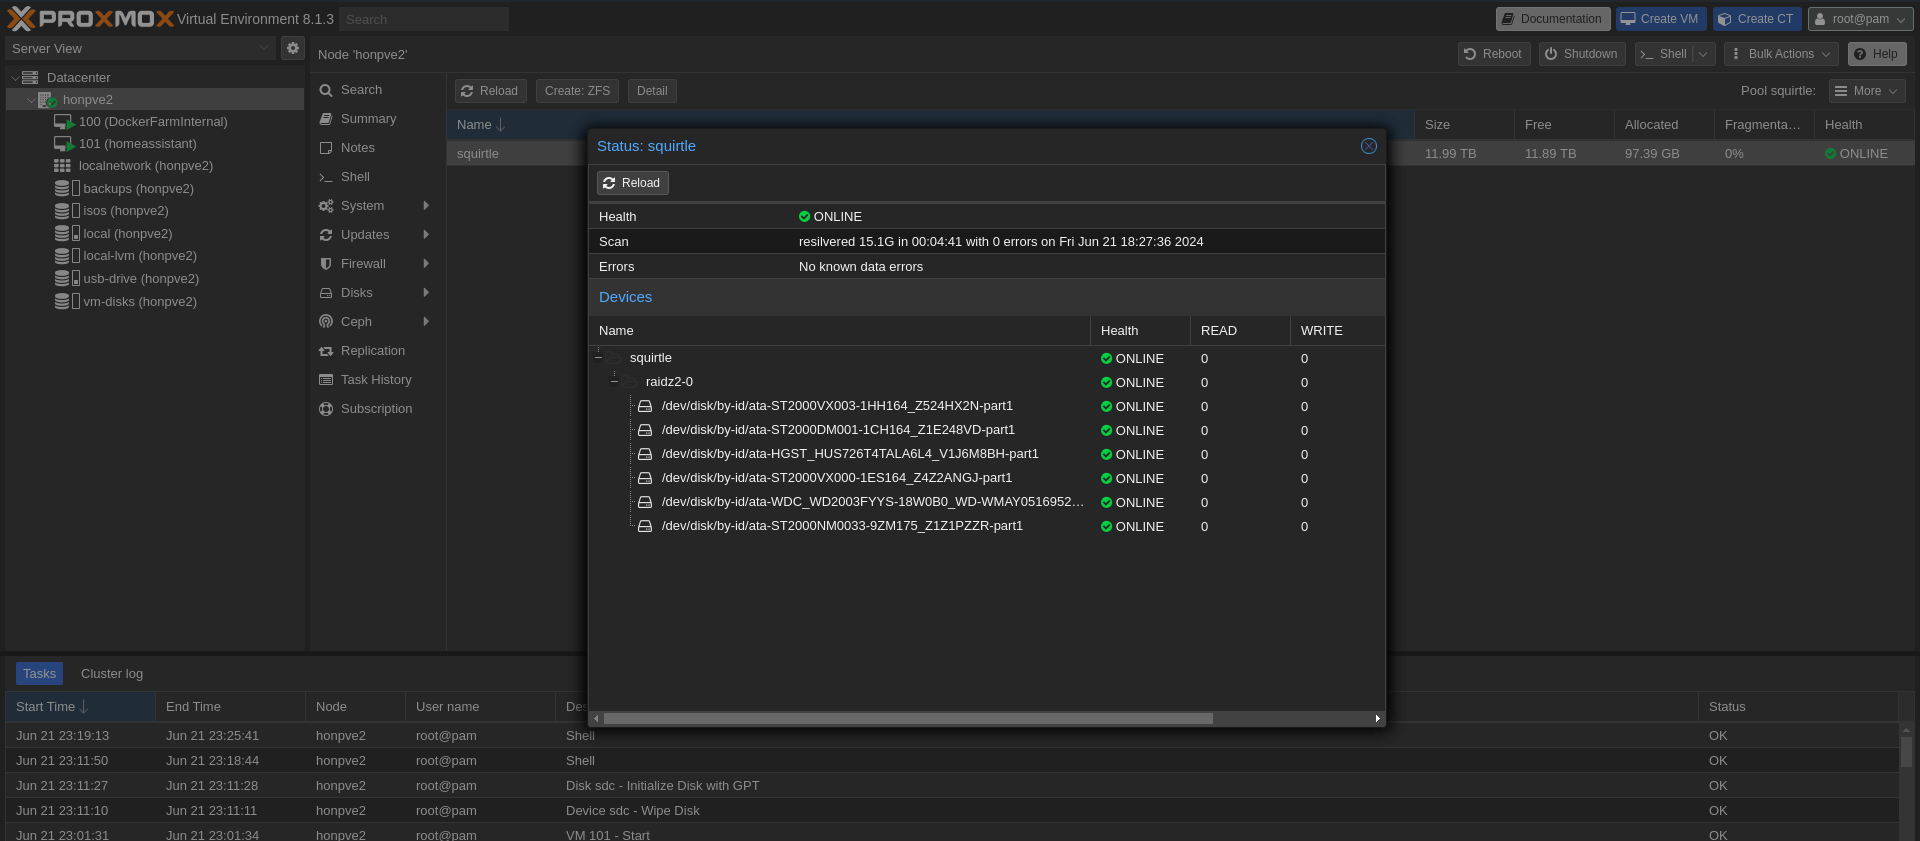
You can then run the zpool status command and see that it is reslivering and for a confirmation that your pool is healthy again once it is completed. This information is also available under the ZFS tab and Details button on your server’s storage list.
Expand The Pool Size:
Occasional you will get a device or resource is busy error and you will not be allowed to add the new hard drive to the pool. If that is the case take the drive offline and then replace it as follows:
zpool offline POOLNAME OLD_DISKS_GUID
When all of your disks have been upgraded to a newer size you will have to isue the new command for each disk to increase the size of the pool:
zpool online -e POOLNAME DISKNAME

OR

zpool online -e squirtle ata-HGST_HUS726T4TALA6L4_V1J6M8BH