| July 14, 2026
How to Download Video from Genetec Security Desk
Genetec is often considered the best security suite an organization can use, and for good reason. Despite receiving this well-deserved praise users often find themselves overwhelmed by all of the options and features. One question I often get is “How do I retrieve my security footage if I need to share it with police or my organization?”. Today we are going to review the steps necessary to download and share video footage to your computer, a thumb drive, or burn it to a disk (yes, that still happens!).
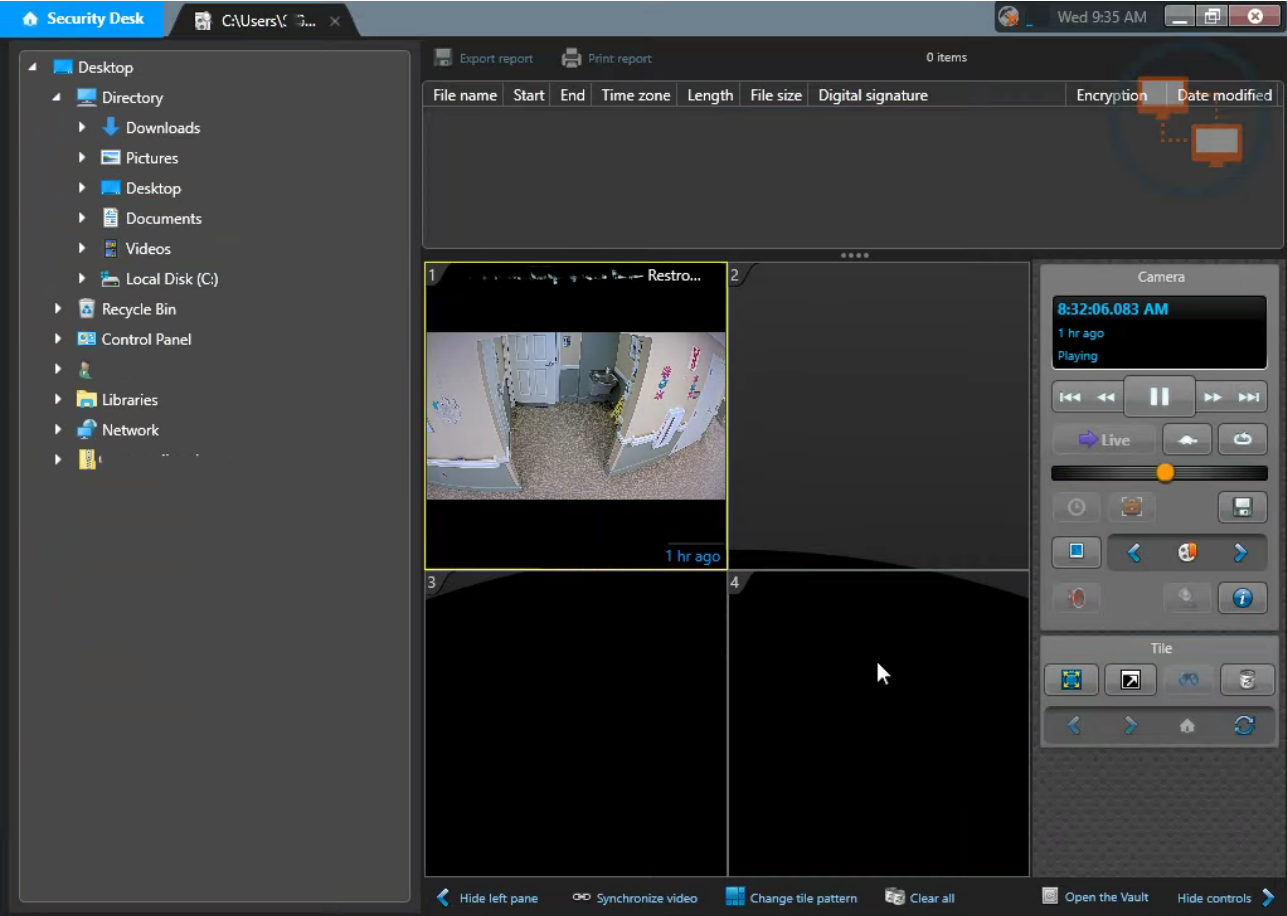
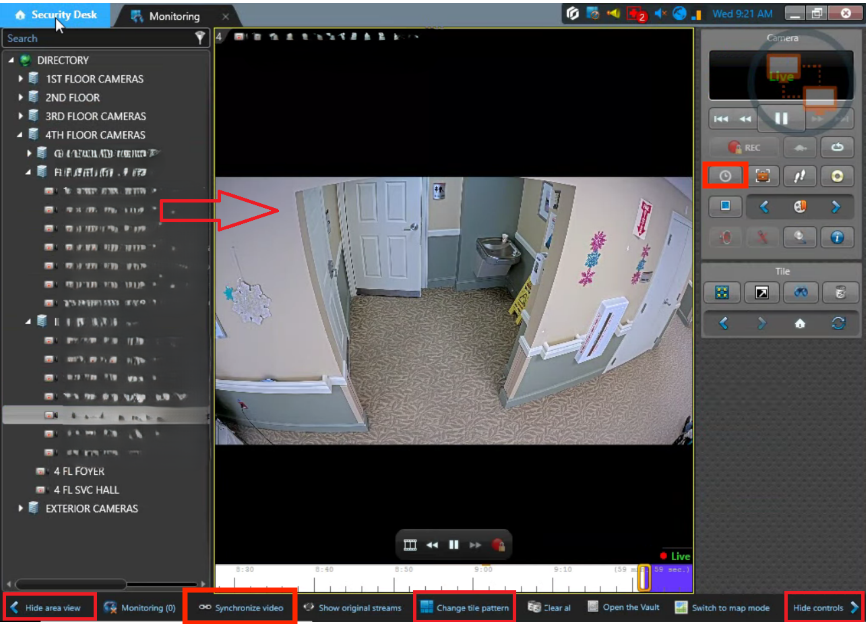
Step 1: Drag your camera(s) to the tile(s) in the middle of security desk and use the controls on the right to find the date and time you need to review. Note that you can use the Change Tile Pattern option located at the bottom middle to accommodate how many video feeds you will need for your investigation. If you are using more than one tile I would suggest using the “Synchronize Video” option at the bottom so that the date and time you choose applies to all tiles and not just the highlighted one. Also note that if you do not see the control area or the device view area they may be collapsed and you will need to click the corresponding option to bring them back into view.
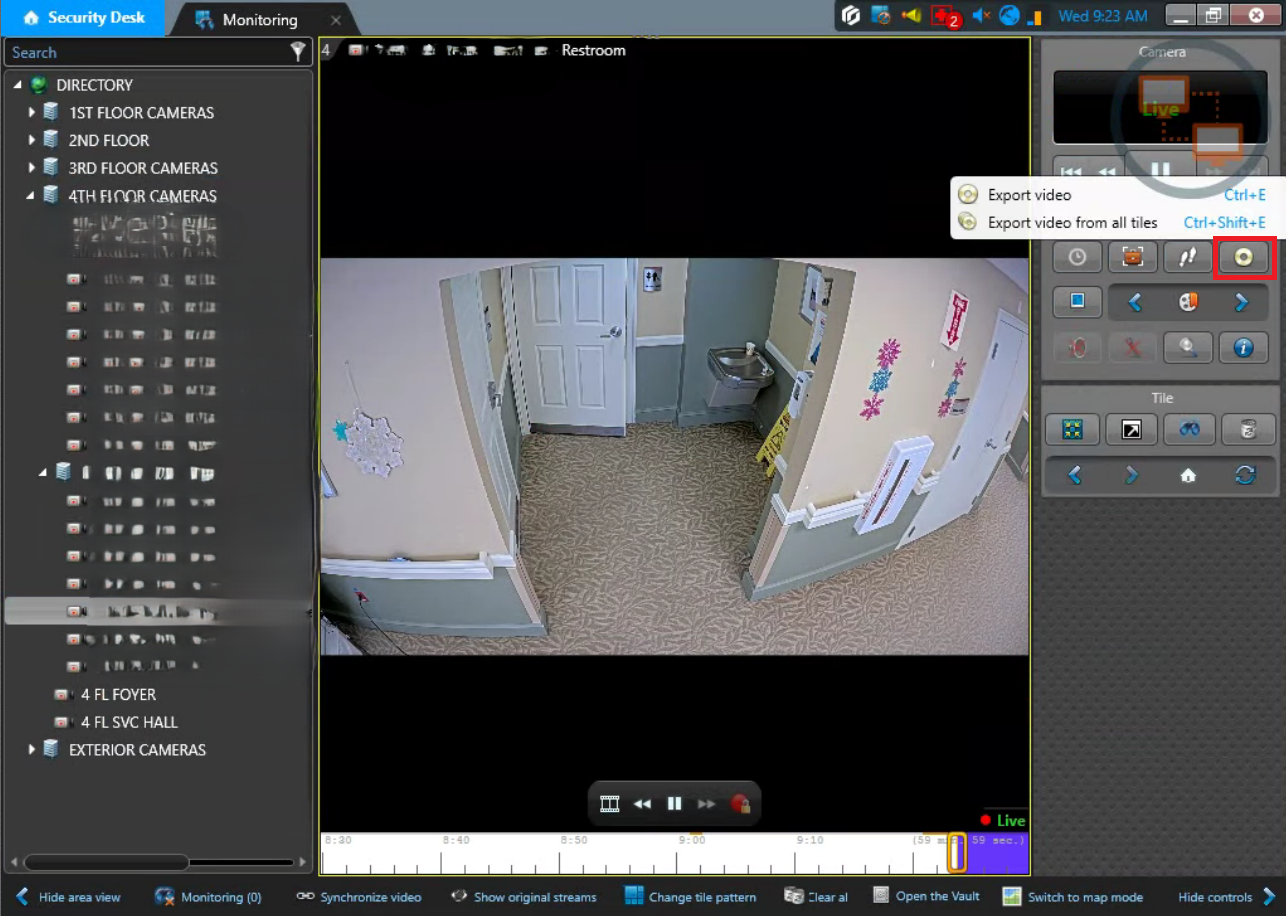
Step 2: Choose the disk icon representing video export in the control center to the right. Choose Export Video to export the active camera tile, or choose Export video from all tiles to export video from all of the video tiles. Note that in later releases of Security Desk this icon has changed to a down arrow to symbolize download video.
Step 3: You will see a screen similar to the image below allowing you to choose your file name and date and time of the video you wish to export once you have completed your investigation.
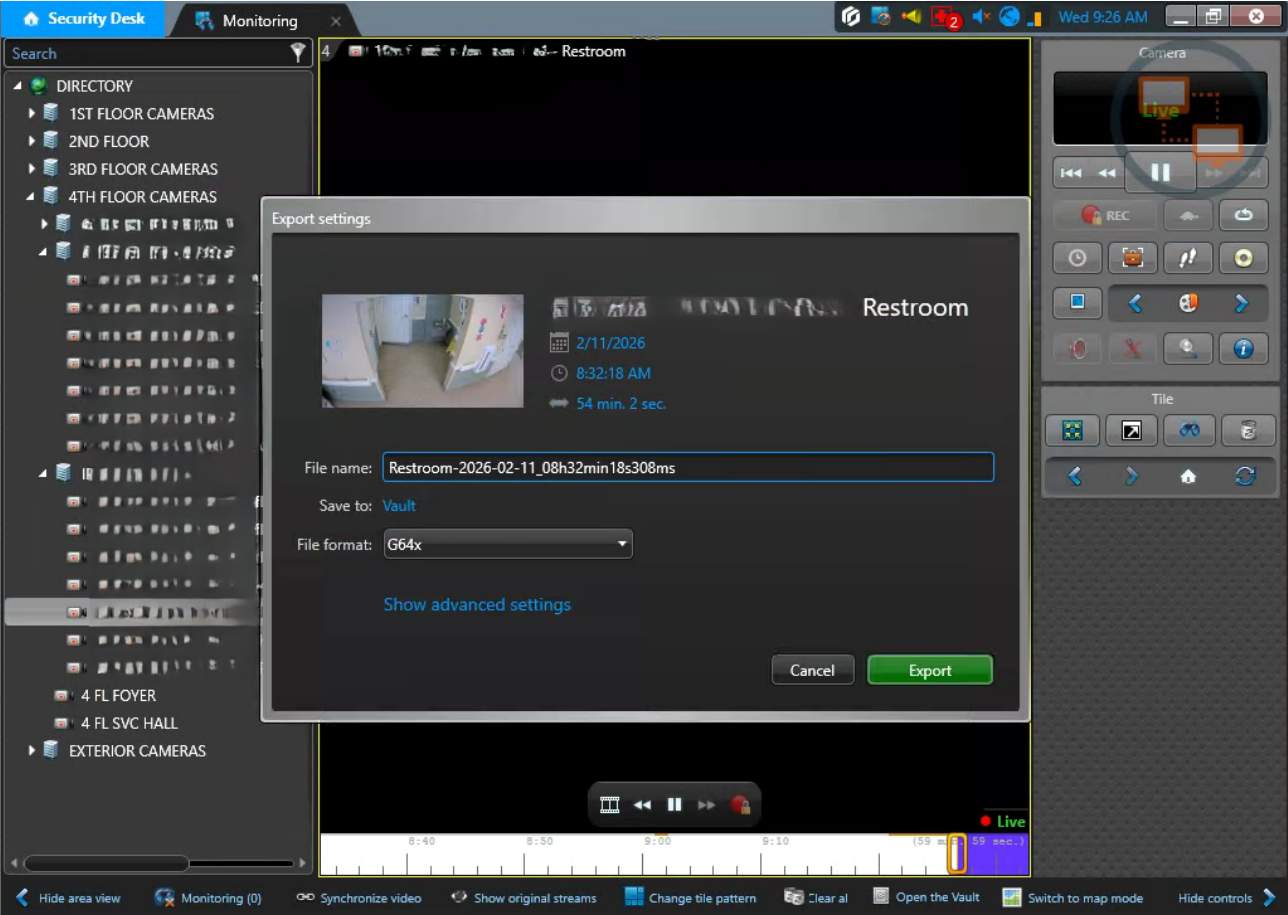
Step 4: Choose the date, time, or length of the video file to filter them. You can manually enter the details in the “to” and “from” boxes, or you can use the beginning/ end sliders to achieve your desired video length.
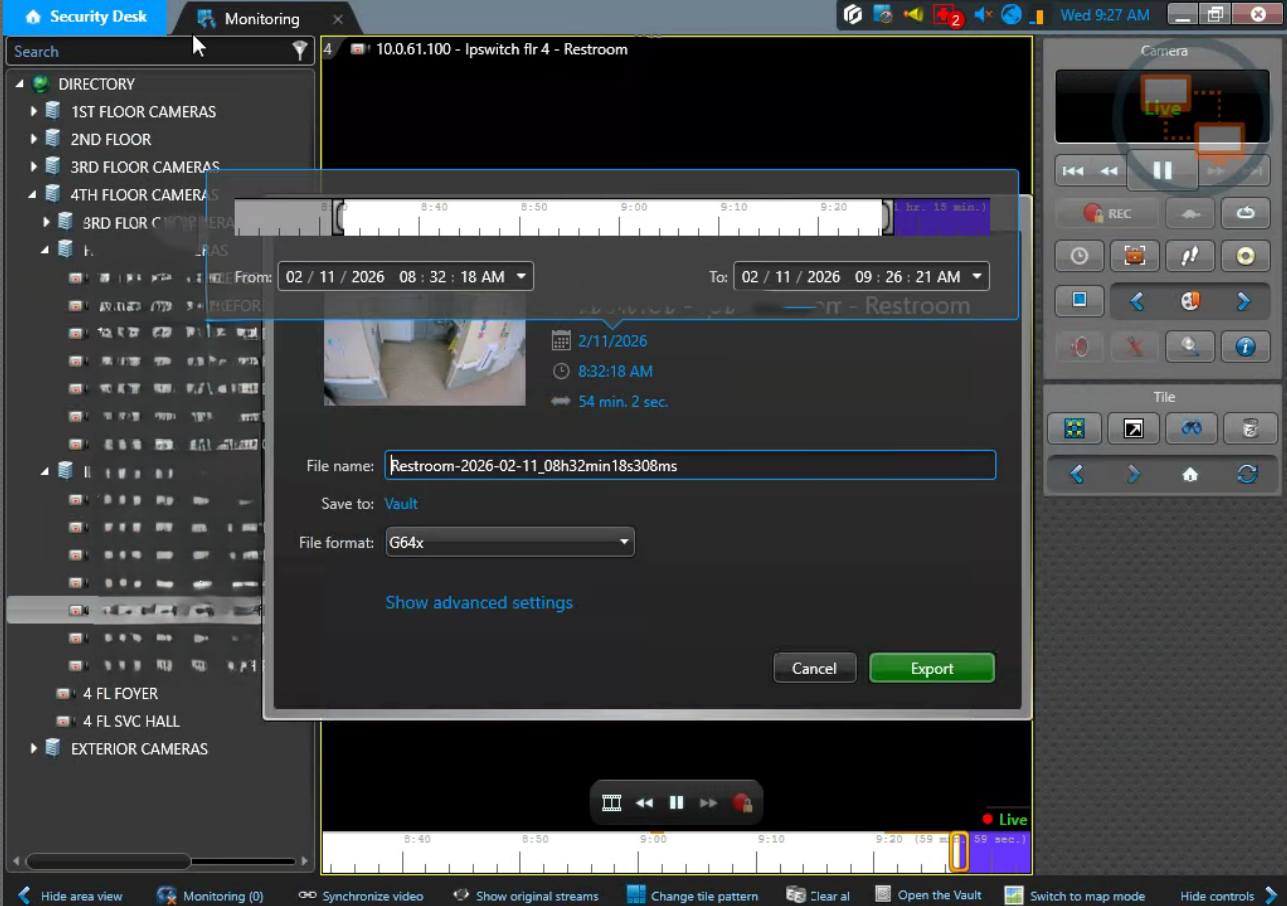
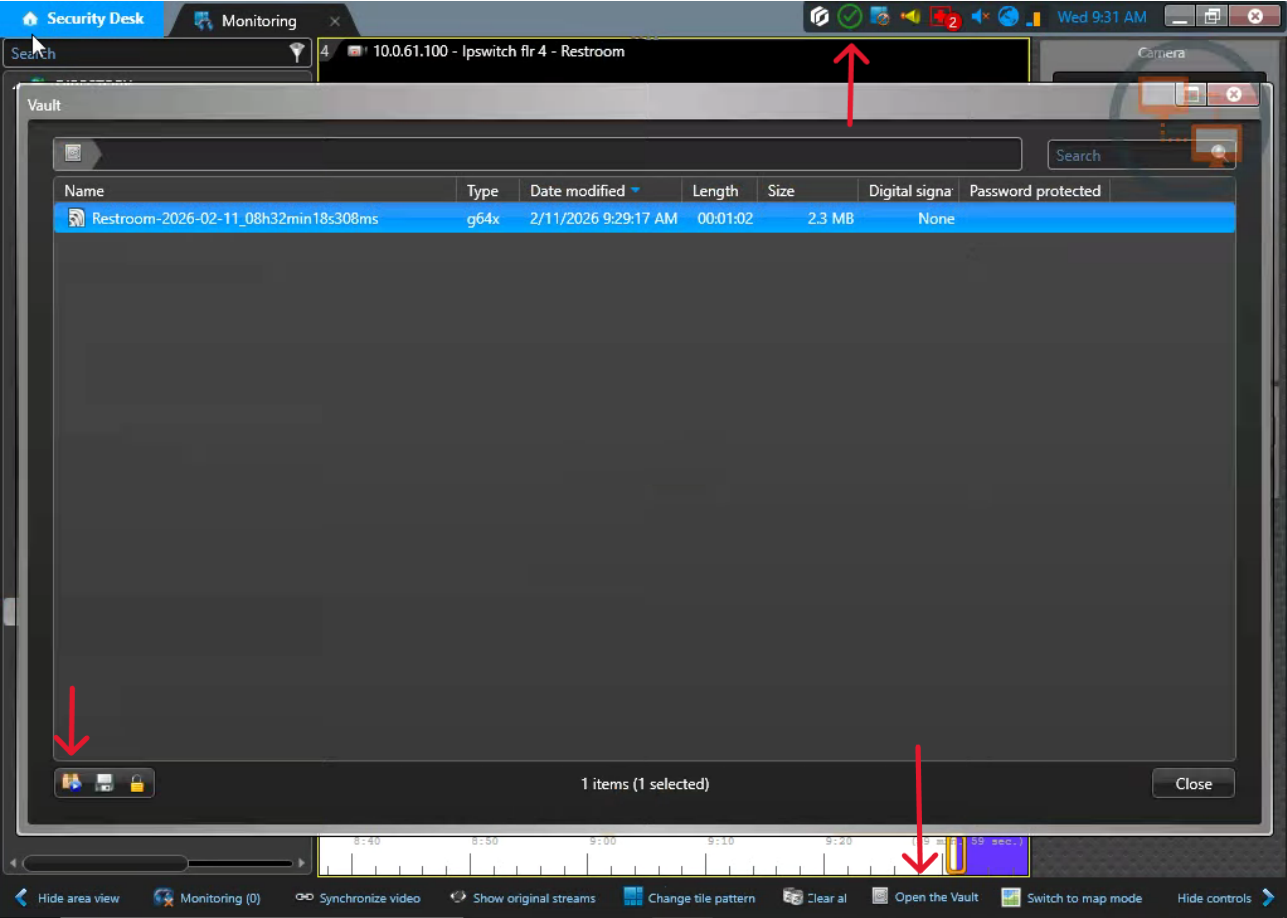
Step 5: Keep the default file format of G64x and the save to location of the vault. Chose Export. You will get a notification when the task has completed, denoted by a green check mark in the top menu bar near the date. Once your file has completed choose Open the Vault at the bottom and highlight your recent file. Choose to package with Genetech video player.
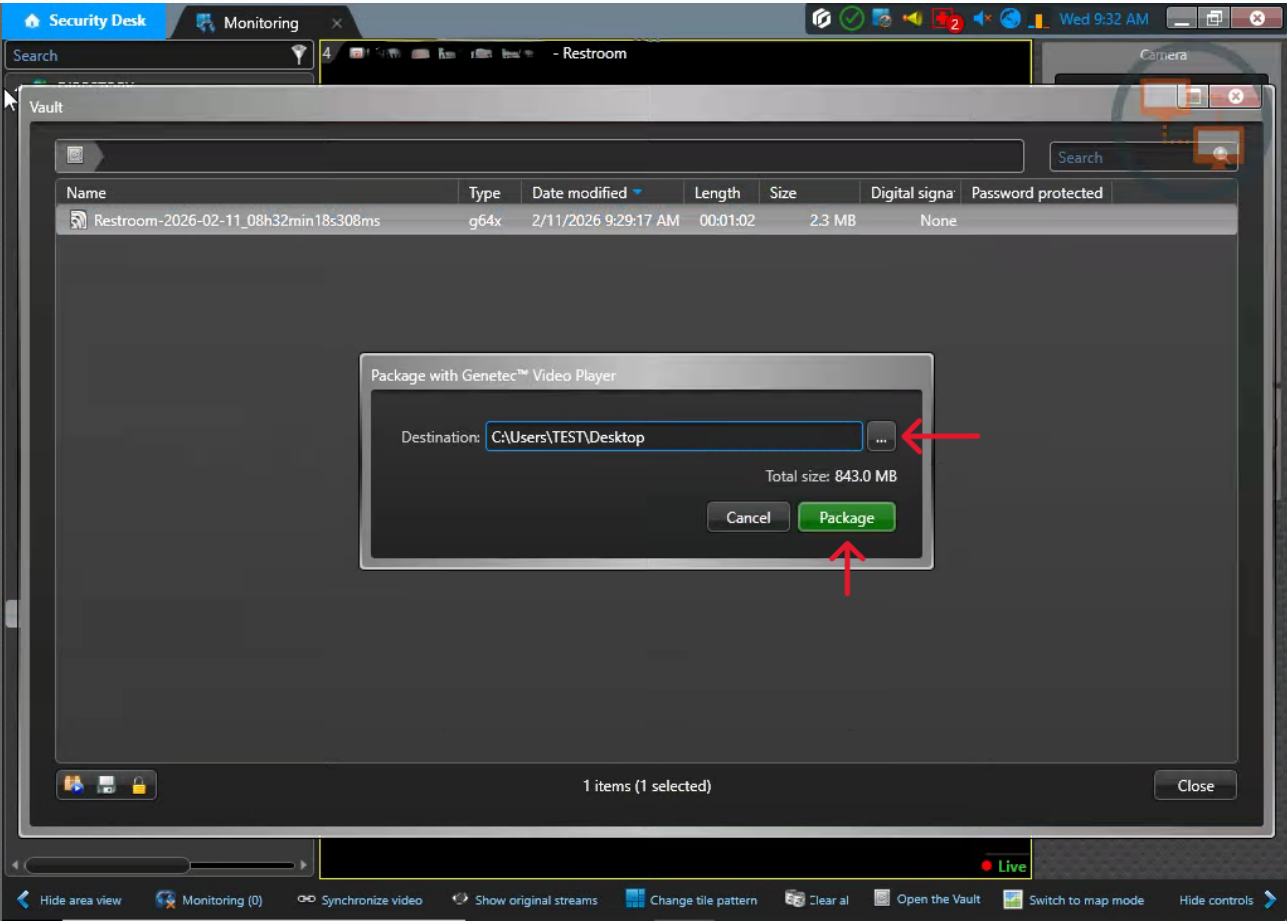
Step 6: Choose what folder to save your recording to. If you are saving it to your desktop create a new folder to save the files in. Choose Package to save.
Step 7: Navigate to where you saved your files and double click on your video recording (with the Security Desk icon).
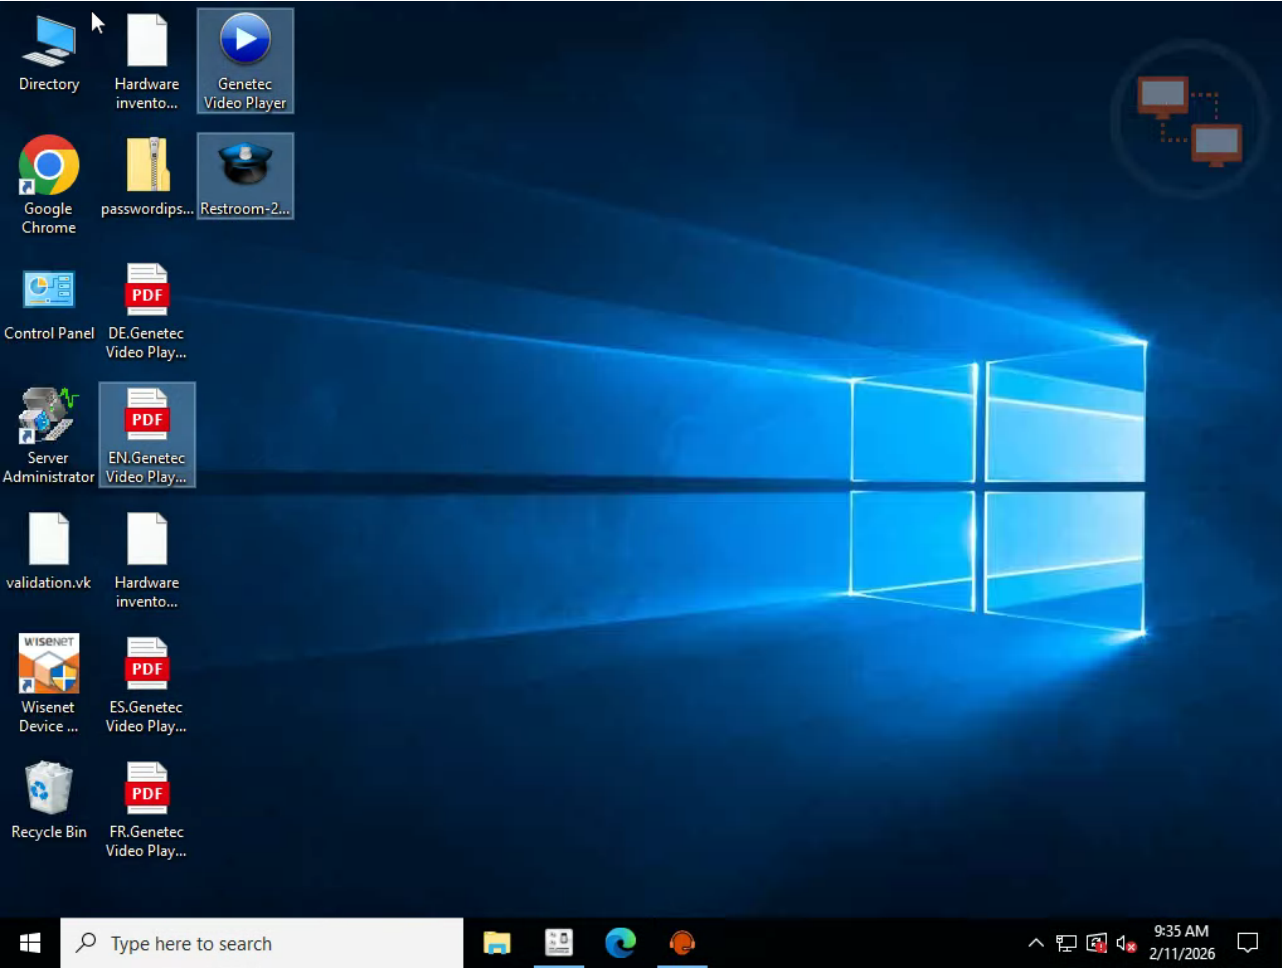
Step 8: Your video will open and you will be able to review the file you saved. Alternatively you can save the exported folder to a thumbdrive or upload to a cloud drive if you need to share it.